


Ahora que tenemos Libretime funcionando y podemos escucharlo en esta dirección:
…hay que llevar su música al exterior.
En esta parte vamos a instalar icecast.
Descripción de la wikipedia:
Icecast es un programa para transmisión en continuo de medios mantenido por la Fundación Xiph.Org. Puede ser utilizado para crear una estación de radio en Internet o para uso privado entre otras cosas. Es muy versátil en lo relativamente fácil que admite nuevos formatos, y además, es compatible con estándares abiertos para comunicación e interacción. El mismo término, es también usado para referirse específicamente al programa servidor que es parte del proyecto.y como no, esto también va alojarse en un contenedor de docker
Para mi comodidad voy a poner icecast dentro del mismo servidor de Libretime, que en mi caso tiene la IP 192.168.0.51, pero podría estar en otro serviceor con otra IP mientra que esté en la misma red de libretime
cd /opt/
git clone https://github.com/MajorcaDevs/docker-icecast.git
cd docker-icecast
mv docker-compose.yml docker-compose.yml.orig
ahora crea otro docker-compose.yml y copia y pega el código a bajo
version: '2'
services:
  icecast:
    image: majorcadevs/icecast
#    env_file:
#     - ./ENV
    ports:
      - "8100:8100"
    restart: always
    networks:
      - web
    environment:
     - GENERATE_TEMPLATE=True
     - IC_RELAY_MASTER_SERVER=master
     - IC_RELAY_MASTER_UPDATE_INTERVAL=30
     - IC_ADMIN=tucorreo@email.org
     - IC_ADMIN_PASSWORD=CONTRASEÑA
     - IC_ADMIN_USER=admin
     - IC_CLIENT_TIMEOUT=30
     - IC_HEADER_TIMEOUT=15
     - IC_HOSTNAME=ice.tormentasolar.win
     - IC_LISTEN_BIND_ADDRESS=0.0.0.0
     - IC_LISTEN_MOUNT=stream
     - IC_LISTEN_PORT=8000
     - IC_LOCATION=España
     - IC_MAX_CLIENTS=100
     - IC_MAX_SOURCES=4
     - IC_SOURCE_PASSWORD=CONTRASEÑA
     - IC_SOURCE_TIMEOUT=10
     - RADIO_MOUNT_NAME=stream
     - RADIO_NAME=ice.radio
     - RADIO_WEBSITE=https://ice.tormentasolar.win
     - GENRE=catholic
     - GENERATE_TEMPLATE=False
     - IC_QUEUE_SIZE=524288
     - IC_BURST_SIZE=65535
     - IC_MASTER_RELAY_PASSWORD=CONTRASEÑA
     - ENABLE_RELAY=False
     - IC_RELAY_MASTER_SERVER=CONTRASEÑA
     - IC_RELAY_MASTER_PORT=8001
     - IC_RELAY_MASTER_UPDATE_INTERVAL=120
     - IC_RELAY_MASTER_PASSWORD=CONTRASEÑA
     - IC_DEBUG_LOGLEVEL=3
     - IC_LOGSIZE=10000
    labels:
      # This one is important since we default to not expose
      #- "traefik.enable=true"
      #- "traefik.frontend.rule=Host:ice.tormentasolar.win"
      - "traefik.docker.network=web"
      - "traefik.http.middlewares.test-redirectscheme.redirectscheme.scheme=https"
      - "traefik.http.middlewares.test-redirectscheme.redirectscheme.permanent=true"
#    volumes:
      #- "/opt/icecast/etc:/etc"
      #- ~/path/on/host:/path/on/container
    volumes:
     - ./icecast.xml:/etc/icecast.xml
networks:
  web:
    external: true
Tienes que cambiar Correo, Contraseña. El Dominio Host no hace falta porqué traefik no está en este servidor. Esto lo vamos a ver en al 4ª parte
Antes de lanzar el docker-compose hay que crear el fichero icecast.xml. Al no hacerlo te dará un error de montaje
crea el fichero icecast.xml y copia y pega dentro esto:
<icecast>
    <!-- location and admin are two arbitrary strings that are e.g. visible
         on the server info page of the icecast web interface
         (server_version.xsl). -->
    <location>Espàña</location>
    <admin>correo@email.org</admin>

    <!-- IMPORTANT!
         Especially for inexperienced users:
         Start out by ONLY changing all passwords and restarting Icecast.
         For detailed setup instructions please refer to the documentation.
         It's also available here: http://icecast.org/docs/
    -->

    <limits>
        <clients>100</clients>
        <sources>2</sources>
        <queue-size>524288</queue-size>
        <client-timeout>30</client-timeout>
        <header-timeout>15</header-timeout>
        <source-timeout>10</source-timeout>
        <!-- If enabled, this will provide a burst of data when a client
             first connects, thereby significantly reducing the startup
             time for listeners that do substantial buffering. However,
             it also significantly increases latency between the source
             client and listening client.  For low-latency setups, you
             might want to disable this. -->
        <burst-on-connect>1</burst-on-connect>
        <!-- same as burst-on-connect, but this allows for being more
             specific on how much to burst. Most people won't need to
             change from the default 64k. Applies to all mountpoints  -->
        <burst-size>65535</burst-size>
    </limits>

    <authentication>
        <!-- Sources log in with username 'source' -->
        <source-password>CONTRASEÑA</source-password>
        <relay-user>relay</relay-user>
        <!-- Relays log in with username 'relay' -->
        <relay-password>CONTRASEÑA</relay-password>

        <!-- Admin logs in with the username given below -->
        <admin-user>admin</admin-user>
        <admin-password>CONTRASEÑA</admin-password>
    </authentication>


   <master-server>192.168.0.51</master-server>
   <master-server-port>18000</master-server-port>
   <master-update-interval>120</master-update-interval>
   <master-username>relay</master-username>
   <master-password>CONTRASEÑA-DE-LIBRETIME</master-password>
   <relays-on-demand>0</relays-on-demand>

    <!-- set the mountpoint for a shoutcast source to use, the default if not
         specified is /stream but you can change it here if an alternative is
         wanted or an extension is required
    <shoutcast-mount>/live.nsv</shoutcast-mount>
    -->

    <!-- Uncomment this if you want directory listings -->
    <!--
    <directory>
        <yp-url-timeout>15</yp-url-timeout>
        <yp-url>http://dir.xiph.org/cgi-bin/yp-cgi</yp-url>
    </directory>
    -->

    <!-- This is the hostname other people will use to connect to your server.
         It affects mainly the urls generated by Icecast for playlists and yp
         listings. You MUST configure it properly for YP listings to work!
    -->
    <hostname>ice.tormentasolar.win</hostname>

    <!-- You may have multiple <listen-socket> elements -->
    <listen-socket>
        <port>8100</port>
        <!-- <bind-address>127.0.0.1</bind-address> -->
        <!-- <shoutcast-mount>/stream</shoutcast-mount> -->
    </listen-socket>
    <!--
    <listen-socket>
        <port>8080</port>
    </listen-socket>
    -->
    <!--
    <listen-socket>
        <port>8443</port>
        <ssl>1</ssl>
    </listen-socket>
    -->


    <!-- Global header settings
         Headers defined here will be returned for every HTTP request to Icecast.

         The ACAO header makes Icecast public content/API by default
         This will make streams easier embeddable (some HTML5 functionality needs it).
         Also it allows direct access to e.g. /status-json.xsl from other sites.
         If you don't want this, comment out the following line or read up on CORS.
    -->
    <http-headers>
        <header name="Access-Control-Allow-Origin" value="*" />
    </http-headers>


    <!-- Relaying
         You don't need this if you only have one server.
         Please refer to the documentation for a detailed explanation.
    -->
    <!--<master-server>127.0.0.1</master-server>-->
    <!--<master-server-port>8001</master-server-port>-->
    <!--<master-update-interval>120</master-update-interval>-->
    <!--<master-password>hackme</master-password>-->

    <!-- setting this makes all relays on-demand unless overridden, this is
         useful for master relays which do not have <relay> definitions here.
         The default is 0 -->
    <!--<relays-on-demand>1</relays-on-demand>-->
    <!--
    <relay>
        <server>127.0.0.1</server>
        <port>8080</port>
        <mount>/example.ogg</mount>
        <local-mount>/different.ogg</local-mount>
        <on-demand>0</on-demand>

        <relay-shoutcast-metadata>0</relay-shoutcast-metadata>
    </relay>
    -->


    <!-- Mountpoints
         Only define <mount> sections if you want to use advanced options,
         like alternative usernames or passwords
    -->

    <!-- Default settings for all mounts that don't have a specific <mount type="normal">.
    -->
    <!--
    <mount type="default">
        <public>0</public>
        <intro>/server-wide-intro.ogg</intro>
        <max-listener-duration>3600</max-listener-duration>
        <authentication type="url">
                <option name="mount_add" value="http://auth.example.org/stream_start.php"/>
        </authentication>
        <http-headers>
                <header name="foo" value="bar" />
        </http-headers>
    </mount>
    -->

    <!-- Normal mounts -->
    <!--
    <mount type="normal">
        <mount-name>/example-complex.ogg</mount-name>

        <username>othersource</username>
        <password>hackmemore</password>

        <max-listeners>1</max-listeners>
        <dump-file>/tmp/dump-example1.ogg</dump-file>
        <burst-size>65536</burst-size>
        <fallback-mount>/example2.ogg</fallback-mount>
        <fallback-override>1</fallback-override>
        <fallback-when-full>1</fallback-when-full>
        <intro>/example_intro.ogg</intro>
        <hidden>1</hidden>
        <public>1</public>
        <authentication type="htpasswd">
                <option name="filename" value="myauth"/>
                <option name="allow_duplicate_users" value="0"/>
        </authentication>
        <http-headers>
                <header name="Access-Control-Allow-Origin" value="http://webplayer.example.org" />
                <header name="baz" value="quux" />
        </http-headers>
        <on-connect>/home/icecast/bin/stream-start</on-connect>
        <on-disconnect>/home/icecast/bin/stream-stop</on-disconnect>
    </mount>
    -->

    <!--
    <mount type="normal">
        <mount-name>/auth_example.ogg</mount-name>
        <authentication type="url">
            <option name="mount_add"       value="http://myauthserver.net/notify_mount.php"/>
            <option name="mount_remove"    value="http://myauthserver.net/notify_mount.php"/>
            <option name="listener_add"    value="http://myauthserver.net/notify_listener.php"/>
            <option name="listener_remove" value="http://myauthserver.net/notify_listener.php"/>
            <option name="headers"         value="x-pragma,x-token"/>
            <option name="header_prefix"   value="ClientHeader."/>
        </authentication>
    </mount>
    -->

    <fileserve>1</fileserve>

    <paths>
        <!-- basedir is only used if chroot is enabled -->
        <basedir>/usr/share/icecast</basedir>

        <!-- Note that if <chroot> is turned on below, these paths must both
             be relative to the new root, not the original root -->
        <logdir>/var/log/icecast</logdir>
        <webroot>/usr/share/icecast/web</webroot>
        <adminroot>/usr/share/icecast/admin</adminroot>
        <!-- <pidfile>/usr/share/icecast/icecast.pid</pidfile> -->

        <!-- Aliases: treat requests for 'source' path as being for 'dest' path
             May be made specific to a port or bound address using the "port"
             and "bind-address" attributes.
          -->
        <!--
        <alias source="/foo" destination="/bar"/>
        -->
        <!-- Aliases: can also be used for simple redirections as well,
             this example will redirect all requests for http://server:port/ to
             the status page
        -->
        <alias source="/" destination="/status.xsl"/>
        <!-- The certificate file needs to contain both public and private part.
             Both should be PEM encoded.
        <ssl-certificate>/usr/share/icecast/icecast.pem</ssl-certificate>
        -->
    </paths>

    <logging>
        <accesslog>access.log</accesslog>
        <errorlog>error.log</errorlog>
        <!-- <playlistlog>playlist.log</playlistlog> -->
        <loglevel>3</loglevel> <!-- 4 Debug, 3 Info, 2 Warn, 1 Error -->
        <logsize>10000</logsize> <!-- Max size of a logfile -->
        <!-- If logarchive is enabled (1), then when logsize is reached
             the logfile will be moved to [error|access|playlist].log.DATESTAMP,
             otherwise it will be moved to [error|access|playlist].log.old.
             Default is non-archive mode (i.e. overwrite)
        -->
        <!-- <logarchive>1</logarchive> -->
    </logging>

    <security>
        <chroot>0</chroot>
        <changeowner>
            <user>icecast</user>
            <group>icecast</group>
        </changeowner>
    </security>
</icecast>
Aquí también hay que modificar el Nombre de la estación, el correo La contraseña y el dominio, Pero la contraseña de libretime aún no la sabes. Esto lo vamos a ver después.
ahora puedes crear el contenedor:
docker-compose up -d
En seguida va a bajarse y ponerse en marcha.
Para verlo vete con el navegador a
No está haciendo nada, pero allí está.
Conectamos a Libretime
El contenedor de libretime tiene integrado un icecast en su interior, pero exponer directamente este, expondría también a la interfaz de libretime, que está en alpha, y por lo tanto no hay que confiar en su seguridad.
Así que vamos a utilizar una característica interesante de icecast: Puede hacer de repetidor de otro icecast!
Para hacerlo necesitamos saber la contraseña del icecast del contenedor de libretime.
Entramos en el Portainer en el contenedor de libretime y abrimos el terminal de este
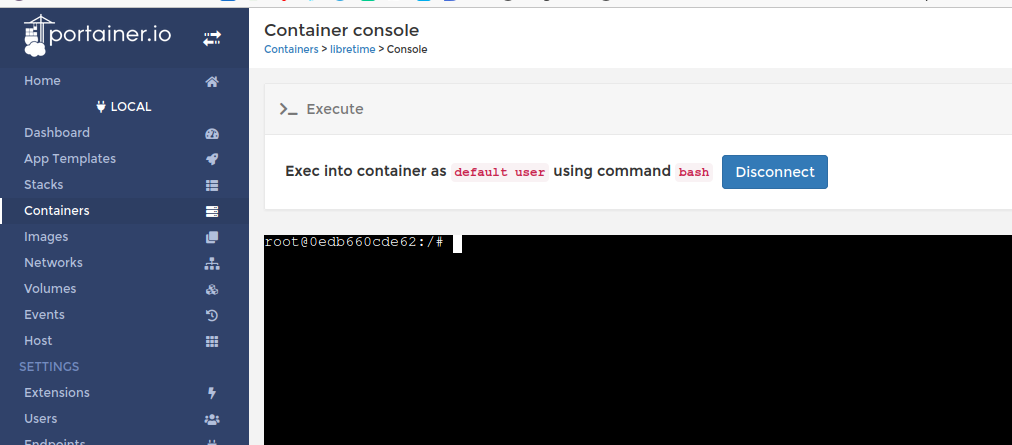
le damos este comando:
cat /etc/airtime/icecast_pass && echo
3dfsdfgsdfg
y la «cosa» a bajo es la contraseña de libretime. Claramente en tu instalación será diferente
Copia la y pega la en el comando a bajo del terminal (real por ssh) que estabas usando para icecast
ahora vete con el terminad de tu ordenador (por ssh) a la carpeta de libretime en el servidor (192.168.0.51 en mi caso)
cd /opt/libretime-docker
echo "3dfsdfgsdfg" > icecast_pass
Vuelve a Portainer y dale este otro comando:
clear && cat /etc/icecast2/icecast.xml
todo el resultado desde <icecast> hasta </icecast> copialo y pegalo en el otro terminal usando mc u otro editor de texto por terminal
mcedit icecast.xml
Pega dentro el contenido del fichero de configuración del icecast de libretime pulsando CTRL-SHIFT-V y guarda con F2 (F10 o ESC 0 para salir)
Ahora en la misma carpeta de docker de libretime tienes esto
root@raspberrypi:/opt/libretime-docker# ls
docker-compose.yml icecast icecast.xml README.md systemctl.py
Dockerfile icecast_pass pkgs_list.apt scripts
root@raspberrypi:/opt/libretime-docker#
Lo importante son lso dos ficheros icecast_pass y icecast.xml
ahora modifica el fichero docker-compose.yml
hay que quitar el # a volumes y tiene que quedar así
volumes:
 - ./icecast.xml:/etc/icecast2/icecast.xml
 - ./icecast_pass:/etc/airtime/icecast_pass
dale el comando
docker-compose up -d
El sistema te dice que ha recreado la imagen y tu libretime sique funcionando.
Si no es así (está en alpha) mejor parar el contenedor y borrarlo, con Portainer
una vez borrado dale otra vez a
docker-compose up -d
y esta vez funcionará.
La pega es que tu libretime se habrá reseteado y por lo tanto hay que volver hacer la configuracion (la por defecto) y sobretodo la programación de la parrilla de músicas.
La creación de estos dos ficheros y la modificación del docker-compose.yml sirve para conectar (bind) los respectivos fichero dentro del contenedor con los que tienes en la carpeta de libretime, así que libretime no podrá cambiarlos y tu podrás leerlos
ahora copia la contraseña que hay en icecast_pass y vete a la carpeta de icecast
cd ../icecast
mcedit icecast.xml
en el fondo después <authentication> y de </authentication> , modifica la contraseña:
   <master-server>192.168.0.51</master-server>
   <master-server-port>18000</master-server-port>
   <master-update-interval>120</master-update-interval>
   <master-username>relay</master-username>
   <master-password>3dfsdfgsdfg</master-password>
   <relays-on-demand>0</relays-on-demand>
master-server es la IP del servidor donde hay libretime (192.168.0.51)
master-server-port es el puerto del icecast de libretime (18000 en nuestro caso)
master-password es la contraseña que tanto te costó sacar del contenedor de libretime 🙂
cuando lo tengas, reinicia el condenedro de icecast desde portainer y en principio tendría que conectarse y transmitir.
Vete a comprobarlo en
Si no hay punto de montaje, asegurate que libretime está «On Air«.
Si no hay una programación no se trasmite nada y por lo tanto el repetidor no hace nada tampoco
Si todo va bien y no has cometidos errores ya tienes el repetidor funcianando. Este sigue siendo visible solo desde tu red interna, pero ya es un gran paso adelante.
En el próximo capitulo vamos a exponer el repetidor a internet y todo el mundo podrá escuchar tu música y tertulias